Upgrading From Rails6 to Rails7
Streamlining Your Web Development Journey: Transitioning Seamlessly from Rails 6 to Rails 7

Introduction
Upgrading a Rails 6 application to Rails 7 can be a complex process that requires careful planning and execution to ensure a smooth transition. Rails 7 introduces several new features and changes that can impact your application's performance, security, and functionality. To make the upgrade process as smooth as possible, it's essential to have a solid understanding of the changes in Rails 7 and how they will affect your application. In this article, I will provide a step-by-step guide on upgrading from Rails 6 to Rails 7, including best practices.
Steps to follow
Review the Rails 7 release notes
Before starting the upgrade, it's essential to understand the changes, new features, and deprecations that come with the new version of Rails. Read the release notes to get an overview of what's new and what's changed here.
Check your Ruby version
Rails 7 requires Ruby 3.0 or higher. Check your Ruby version and update it if necessary.
How to update your Ruby version
To check the Ruby version installed on your system, run the following command in your terminal:
ruby -v
This will display the version of Ruby currently installed on your system.
If you have an older version of Ruby installed, update it to Ruby 3.0 or higher. To update Ruby to a newer version, you can use a Ruby version manager such as rbenv or rvm These tools allow you to install and switch between multiple versions of Ruby.
Updating Ruby on Ubuntu
Update Ruby on Ubuntu by using the built-in package manager apt. Here are the steps to update Ruby using apt:
- Open a terminal window and run the following command to update the package list:
sudo apt update
- Then, run the following command to upgrade the installed packages, including Ruby:
sudo apt upgrade
This command will upgrade all the installed packages on your system, including Ruby if there is a new version available.
Using apt to upgrade Ruby may not always give you the latest version of Ruby available, depending on the version of Ubuntu you are using. If you need a specific version of Ruby, or the latest version is not available through apt, you may need to use a different method, such as using a Ruby version manager rbenv or rvm.
Upgrade Rails gem
Open your project's Gemfile and change the line that specifies the Rails gem to gem 'rails', '~> 7.0'. Open your terminal or command prompt and navigate to your project directory. Run the command bundle update rails. This command will update the Rails gem to the latest version of Rails 7
Check for any other gems that may need to be updated or deprecated for Rails 7 and update them.
Check for compatibility issues
After running bundle update rails, you should check to see if any compatibility issues have arisen with your project's dependencies. Do this by running your test suite and checking for errors or warnings.
Run the Rails 7 upgrade tool
Rails 7 provides an upgrade tool that helps automate the upgrade processes. The rails app:update is a command in Ruby on Rails that updates an existing Rails application to the latest version of Rails. It automates the process of updating the application's configuration files, including config/application.rb, config/environment.rb and config/environments/*.rb
When you run rails app:update this will be the output:

Rails will prompt you to confirm which changes you would like to apply to your application's configuration files. The changes can include updating the Rails version, generating a new config/boot.rb file, updating the default config/database.yml file, and more.
It's recommended to run rails app:update after updating Rails to a new version. This ensures that your application is using the latest configuration and settings that are compatible with the new version of Rails.
Update database migrations
Rails 7 introduces some significant changes to migrations, so you should update any existing migrations to the new format. This can be done using the rails db:schema:dump command, which generates a SQL schema file that can be used to migrate the database to the new format.
Here's how to use the db:schema:dump task:
Open a terminal window and navigate to the root directory of your Rails 7 app.
Run the following command to generate the
schema.rbfile:
rails db:schema:dump
- The
schema.rbfile will be generated in thedbdirectory of your app as shown below:
Schema.rb file
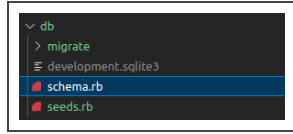
The schema.rb file contains a Ruby representation of the database schema, rather than SQL commands. This makes it easier to read and modify the schema.
Best practices
Upgrading from Rails 6 to Rails 7 can be a complex process, and there are some potential pitfalls and best practices that you should keep in mind. Here are a few tips:
Familiarize yourself with the Rails 7 release notes: Before starting the upgrade process, take the time to read through the Rails 7 release notes to understand what changes are included in this version. This will help you identify any areas of your application that may be affected by the upgrade.
Run the Rails 7 upgrade checker: Rails 7 includes an upgrade checker that can identify potential compatibility issues with your application. Run this checker early in the process to identify potential issues and address them before starting the upgrade.
Upgrade to Rails 6.1 first: Before upgrading to Rails 7, make sure that you're running the latest version of Rails 6. This will ensure that you have the latest security updates and bug fixes before starting the upgrade to Rails 7.
Update your Gemfile: Update your Gemfile to include the latest versions of all the gems that you're using. This will ensure that you have the latest compatible versions of each gem before starting the upgrade.
Test your application thoroughly: Before deploying your upgraded application to production, thoroughly test your application to ensure that all features are functioning as expected. Consider using a staging environment to test your application before deploying it to production.
Monitor your application in production: Once your upgraded application is deployed to production, monitor it closely to identify any issues that may arise. Be prepared to address any issues quickly to minimize the impact on your users.
Stay up-to-date with future releases: Keep up-to-date with future releases of Rails and regularly upgrade your application to the latest version to ensure that you have the latest security updates and bug fixes.
Use version control: Make sure to use version control such as Git when upgrading your Rails application. This will allow you to easily revert to a previous version if something goes wrong during the upgrade process.
Use automated testing: Use automated testing tools such as RSpec or MiniTest to ensure that all features and functionality in your application are working as expected after the upgrade. This will save time and effort compared to manual testing.
Utilize Continuous Integration/Continuous Deployment (CI/CD): Utilize CI/CD pipelines to automate your build, test, and deployment process. This will help ensure that your application is thoroughly tested and deployed consistently.
Consider a phased upgrade: Consider breaking the upgrade into phases or modules, focusing on one feature at a time. This will help ensure that the upgrade process is manageable and allows you to focus on specific areas of your application.
Conclusion
Upgrading from Rails 6 to Rails 7 can bring many benefits, including improved performance, security, and new features. By following best practices, taking a methodical approach, and thoroughly testing the application, developers can successfully upgrade to Rails 7 and take advantage of its new features and improvements.
Keeping your Rails application up-to-date with the latest versions and security updates is essential for the health and security of your application, so it's recommended to stay current with future releases.


